WA801ND v3 Hardware overview
Some weeks ago i’ve succesfully ported OpenWRT to the TP-Link TL WA801ND v3, that access point features 2×2 MIMO, detachable antennas, 32 MBytes of ram and 4 Mbytes of flash.
It is based, like most new tp-link devices on a qualcomm atheros system on chip ( QCA9533-BL3A) which integrates the MIPS core, ethernet switch and wifi hardware.
Accessing the WA801ND serial port
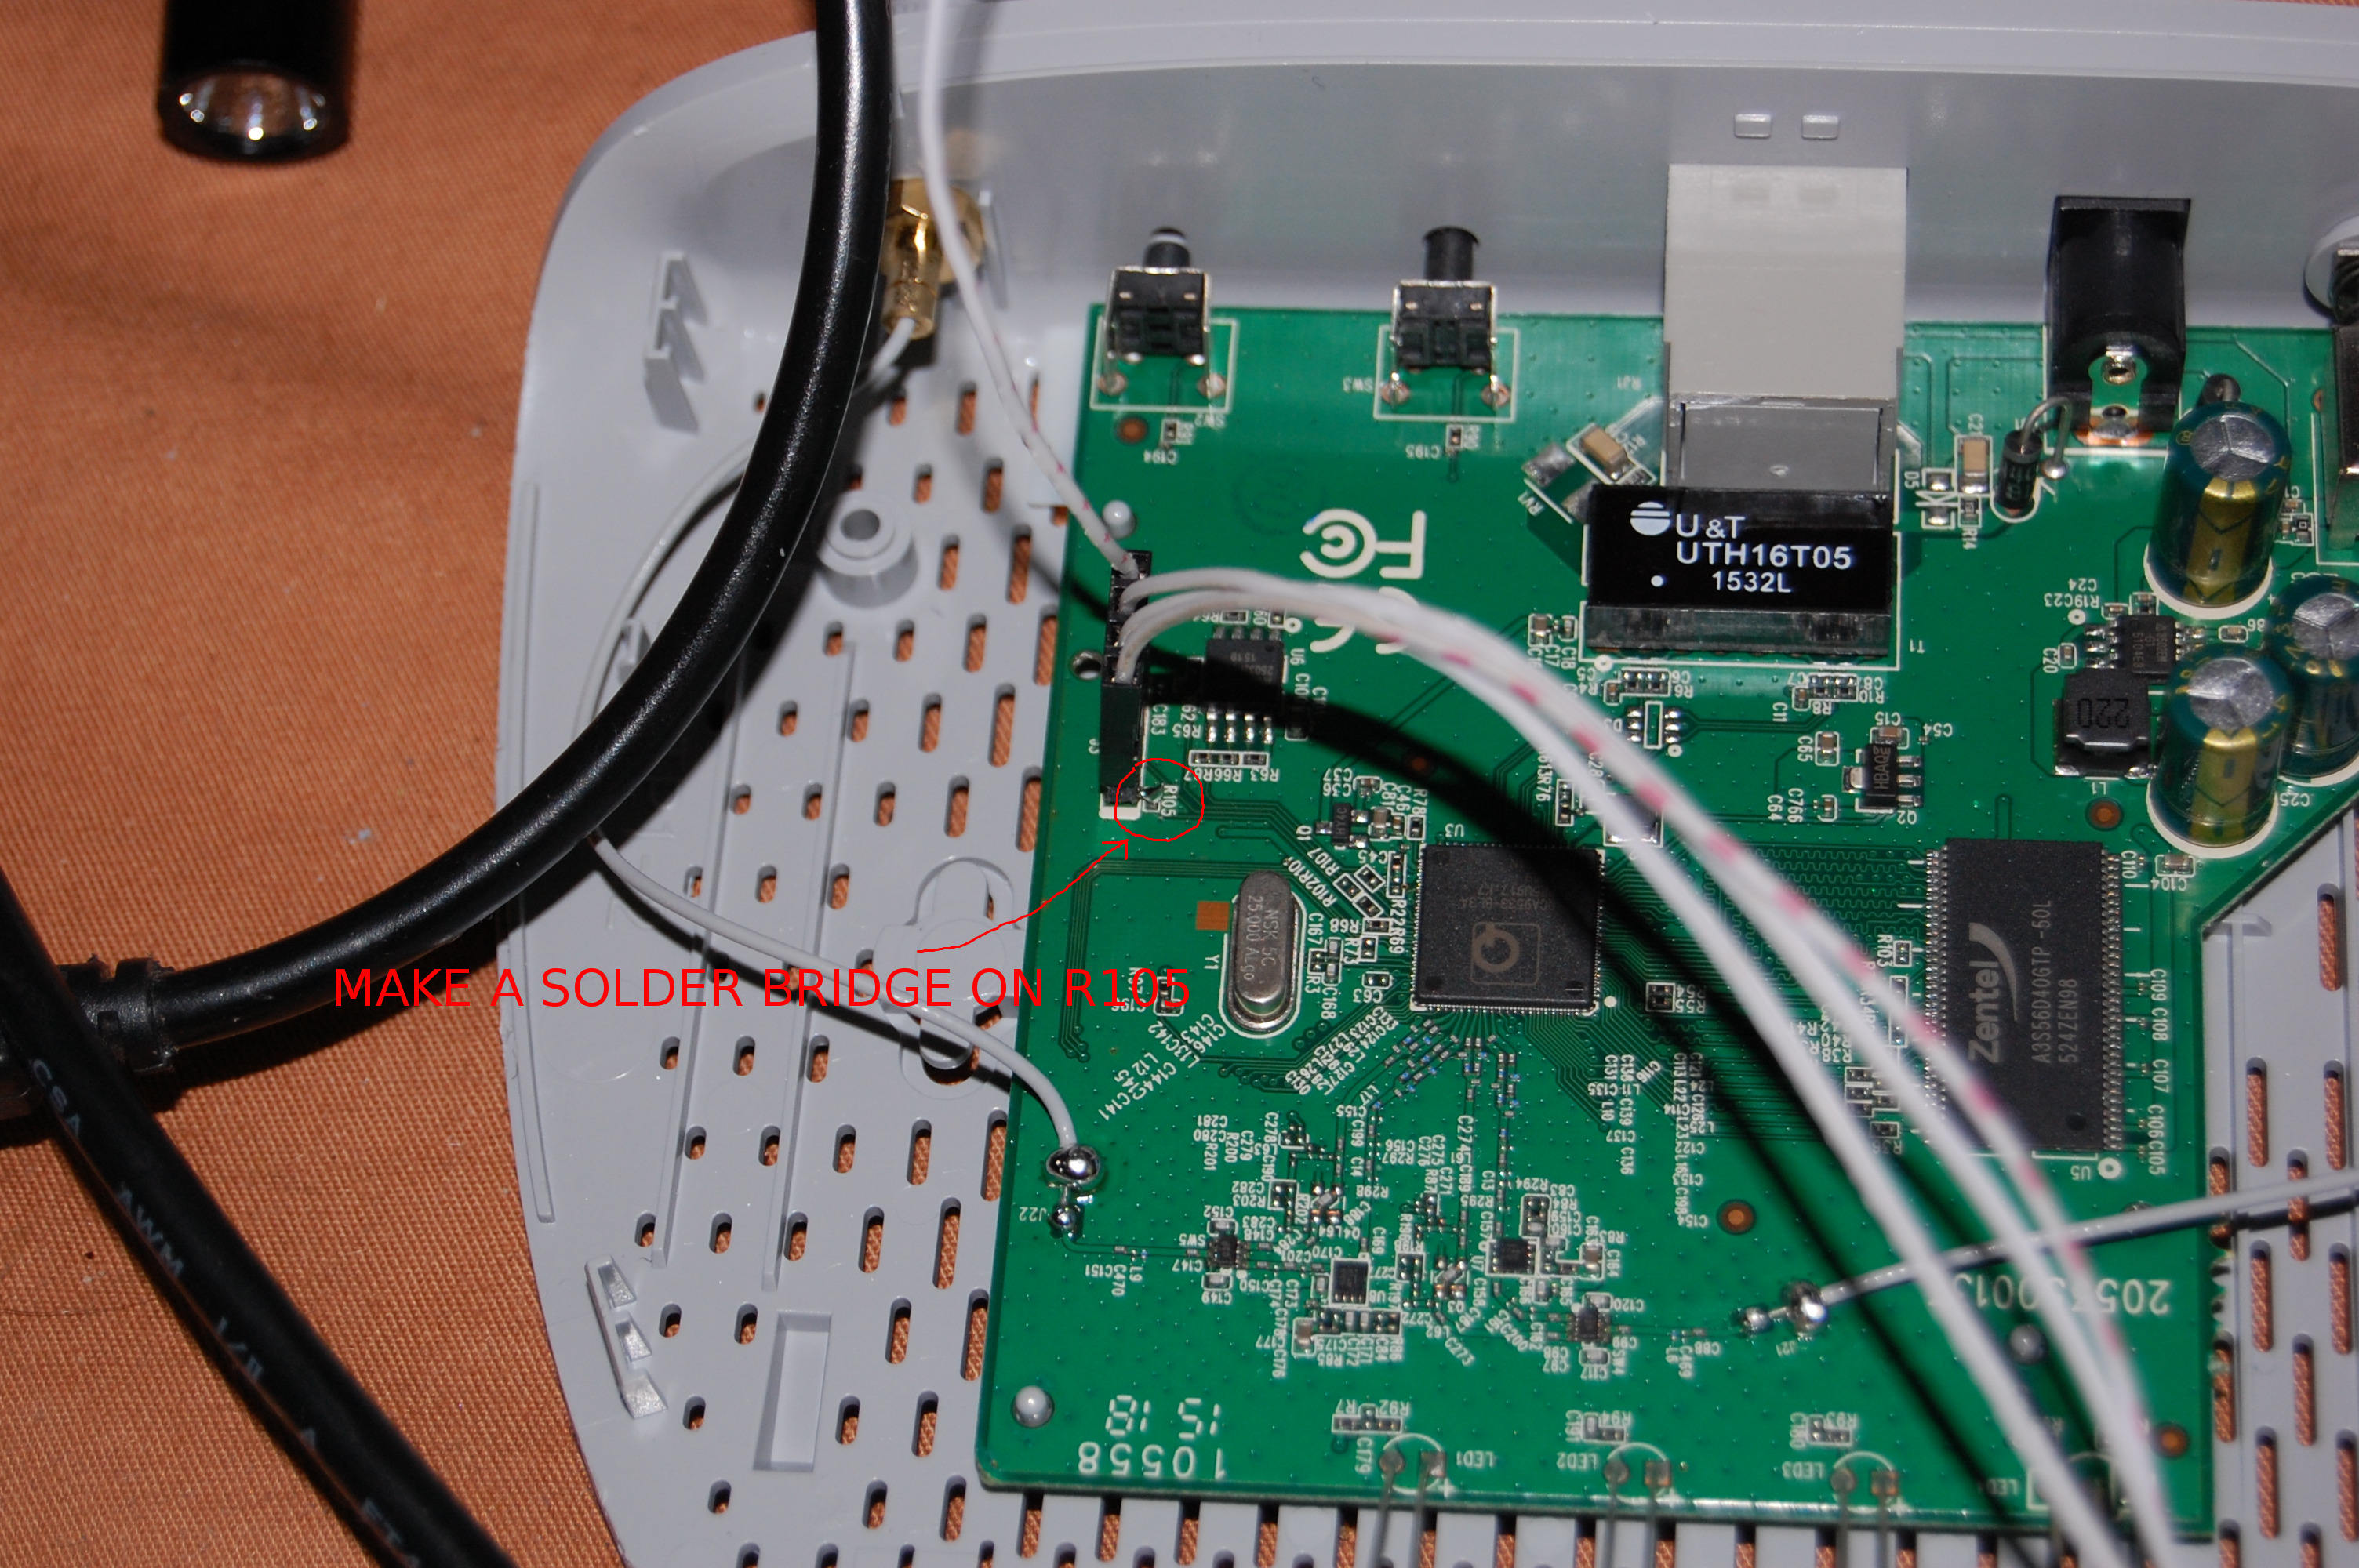
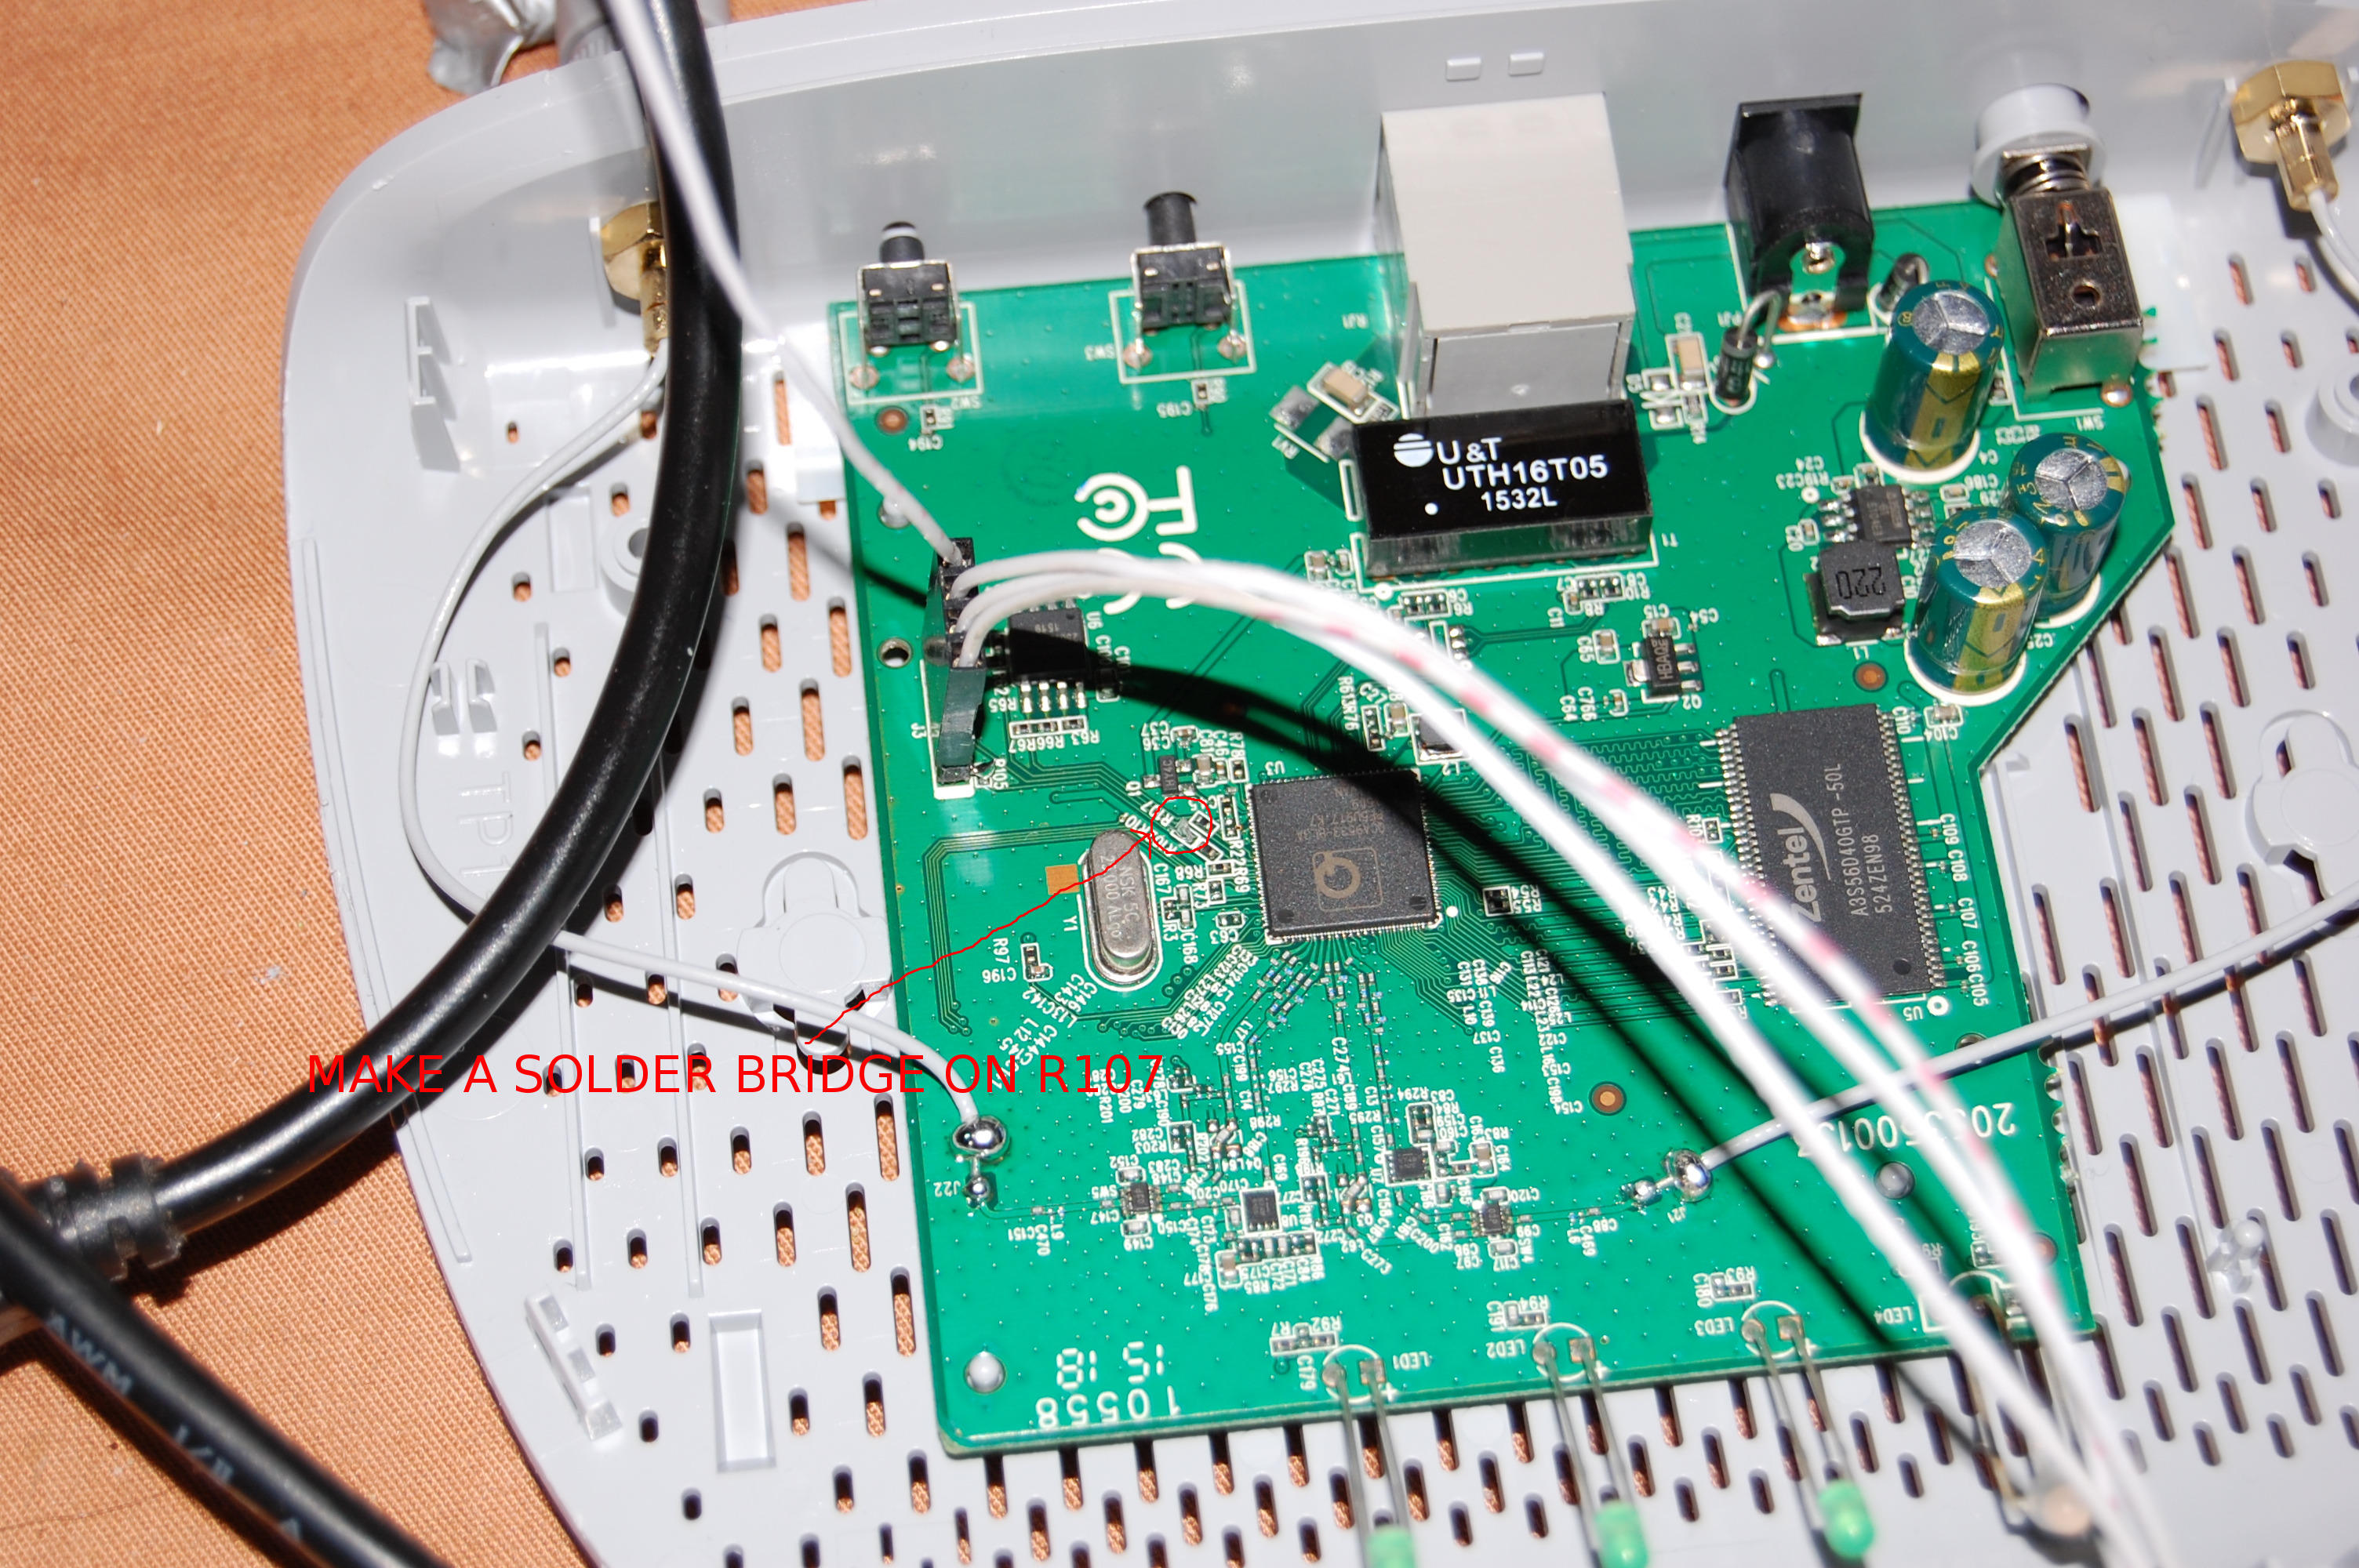
Out of the box even if the serial header is present and has the typical TP-Link pinout, it won’t work, because some resistors are missing from the board, namely R105 and R107.
The serial port settings are, as usual 115200 baud and to enter uboot prompt you have to quickly type “tpl” when it says that it is waiting 1 second.
Installing from the web interface
OpenWRT trunk builds can be installed using the original tp-link firmware from the web interface.
In order to do that download openwrt trunk build for the device, under the directory ar71xx there should be in trunk a file named openwrt-ar71xx-generic-tl-wa801nd-v3-squashfs-factory.bin , download it and rename it to a.bin ( tested working, but maybe anything works ), and use it to upgrade the access point from the web interface.
Once you uploaded the file, wait for the device to reboot, when it reboots currently , no leds will be lit.
That’s because by default no led is assigned to anything, maybe i should do some patch to fix that in the future.
To configure it connect with ssh to 192.168.1.1 ( DHCP should be enabled by default too ), or if you have built an image with luci, just navigate to http://192.168.1.1 .
hi, can you share the firmware package?
openwrt-ar71xx-generic-tl-wa801nd-v3-squashfs-factory.bin
hi, it still seems that openwrt didn’t rebuild the snapshot, i can share it anyway https://www.dropbox.com/s/fuxqlf25mcj7gv2/openwrt-ar71xx-generic-tl-wa801nd-v3-squashfs-factory.bin?dl=0
Beware that on this image i have compiled in LuCI and full hostapd, but NOT wpa_supplicant so you can’t use it as a wireless client, if you need that i can upload package files
Thank you, I only need it as AP. Best Regards