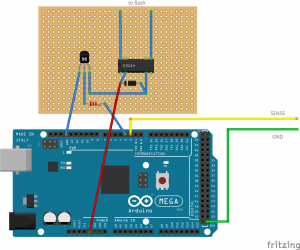
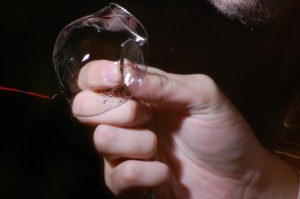
Have you ever wondered how a bubble looks like while popping? if you think it just “disappears”, you are wrong, and provided you have a decent flash and a camera that allows you to use something like 10sec shutter speed, then you can take such photos with just a relay module and an Arduino.
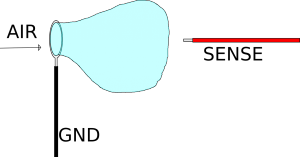
The idea to trigger the flash at the right moment is to form with the end of a wire an “O” shape and then with another wire, when the bubble touches the wire, it will shortly conduct some current that can be used to trigger the flash.
But as you can imagine it’s not that easy doing it, the bubble is very thin and it will conduct only for a fraction of second before poppin, its resistance will be around 10 megaohms, so either you need to build a GOOD low noise amplifier or just use the trick i’m going to explain.
If you have some experience with electronics you already know that a wire has a certain capacitance caused by surrounding stuff and air as dielectric, otherwise, well, now you do.
To be able to detect the bubble touching both wires at the same time, the trick is charging the “wire capacitor” to +5V, then switch the pin to high impedence input and measure how much it takes to discharge because of leakage current of your arduino.
Since that parameter may vary for each board, wire length, wire insulation and other stuff, you have to find the open circuit value experimentally.
If you have it, you can use an SCR too instead of the relay, but be sure to add a delay in the arduino sketch to get the correct timing on photo ( a relay typically takes 6-15ms to trigger the flash ).
.
|
1 2 3 4 5 6 7 8 9 10 11 12 13 14 15 16 17 18 19 20 21 22 23 24 25 26 27 28 29 30 31 32 33 34 35 36 37 38 39 40 41 42 |
int cons; void setup() { cons = 0; Serial.begin(115200); pinMode(3,OUTPUT); digitalWrite(3,LOW); } void loop() { int i = 0; pinMode(2,OUTPUT);//Set pin 2 as output digitalWrite(2,HIGH);// "charge" the capacitance of the wire to +5V pinMode(2,INPUT);// set pin 2 as input digitalWrite(2,LOW);// Make sure pull-up is disabled so the pin is at high impedence //Here also a precise time measurement could be used, but since we have to find the "1000" used later experimentally, //and since we are on a realtime program and with a fixed clock frequency, who cares while ( digitalRead(2) ) //Count how many times we can read pin 2 before its voltage decreases so much to become 0 { i++; } //Check if the "wire capacitor" discharged before the expected time if ( i < 1000 ) { //Count how many times that happened consecutively to avoid random static discharges or other kind of interference to influence it, if you can't get it to trigger, try to use 5 instead of 10 cons++; }else{ cons = 0; } if ( cons > 10 ) { digitalWrite(3,HIGH);//Trigger the flash delay(300); digitalWrite(3,LOW); Serial.println("HIT"); delay(2000);//Wait 2 secs to avoid multiple triggering cons = 0; } } |
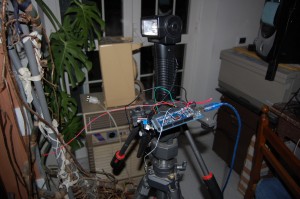
Below is my setup with a flash set to the lowest power ( lowest power means less duration too, so more sharp photos of moving objects ) and triggered by the arduino with a relay
For these photos i’ve used SIGMA 70-300mm lens set at f/16 together with a Nikon d40 body with iso set to 400, the procedure to take a photo is like that, start the exposure using an IR remote, blow a bubble and make it pop while triggering the flash, wait for the remaining exposure time to finish, and enjoy the result.
Needless to say, you need to do that outside at night or in some very dark room otherwise.
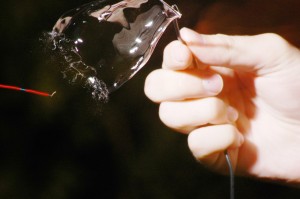
Now it’s time for some results
